
There are many different pemmican recipes out there. While there are certain basic steps for making pemmican, the process can be quite creative and can be adapted to suit any taste. There are many options for making pemmican, including grass-fed beef. Other variations include spices, dried herb, and varying amounts of salt. This section will discuss the nutritional values of common ingredients.
Pemmican is made more efficiently with grass-fed beef.
Pemmican is a high-nutrient dried food made from grass-fed beef and tallow. It's also high in vitamin A and omega-3 fatty oils. Pemmicans are also good sources of iron as well as vitamin B. This versatile food can be eaten by itself or in combination with stir-fried vegetables and eggs.
For making pemmican, beef fat is best. However, lamb fat can also be used. Ask your local butcher to give you fat free of charge. For pemmican, grass-fed meat is better than traditional meat because it has more nutritional value. You can either place the fat in large pots or in a food processer.
Ingredients
There are many ways to make pemmican. One way is to dehydrate the ingredients. First, remove any fat from the meat. Next, take out excess fat and place it in a container. Next, slice the meat into long thin strips. Then, place them on a baking sheet. Then, dry them under direct sunlight or in an oven. Pemmican bars and balls can be made from them.
Pemmican can also be made with peanut butter, coconut oil and various syrups. Using these ingredients will ensure a longer shelf life. Other ingredients than the meat can include spices like peppers and berries. Some recipes use tallow, which can be made from animal fat. It is important to heat the fat slowly until it vaporizes. Then, form bars, patties, or balls. Native American people would store these ingredients in leather bags, which kept them out of the reach of vermin.
Shelf life
Pemmican is one of the oldest known foods, and traditional preparations can keep for up to a year. Its main ingredient, animal fat, is nearly equal to the amount dried meat. Although raw animal fat tends go rancid quicker than rendered fats, it should last longer if it's rendered. Removing water and impurities from rendered fat reduces their content. Pemmican recipes can be preserved for longer periods of time if they are made with the right fats.
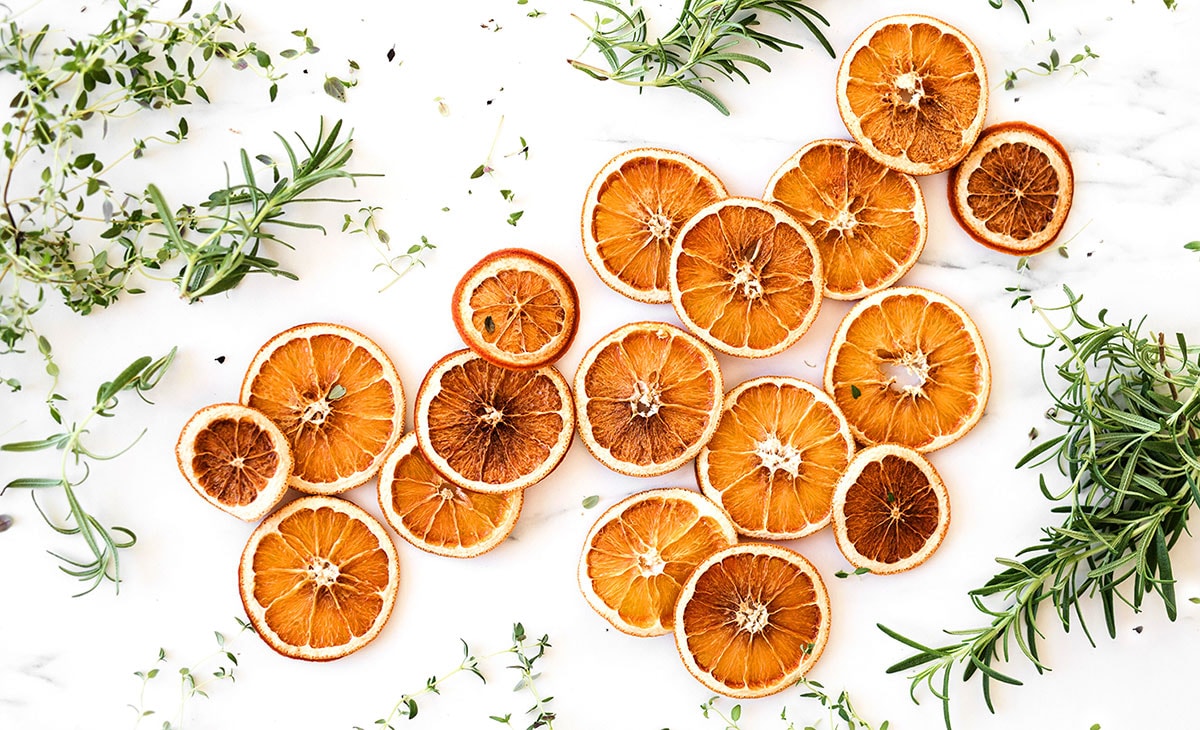
Dried fruit can be added to sweeten the pemmican. Dried lard can also be added for a sweeter flavor. An airtight container is best for long-term storage. Keep it in a dark, cool place. Pemmican was created by early explorers and Native Americans from coconut oil and lard.
Information about nutrition
Pemmican consists of a mixture dried lean and animal fats, along with optional ingredients. It is similar in taste to high-protein bars, and has been used for a long time. Native Americans used pemmican for food preservation and to fuel long treks. These tips will teach you how to make your very own pemmican. While there are many ways to make pemmican, these are some of the key points you should consider when making your own.
Pemmican dates back to Native American tribes from North America and Canada. The recipe for pemmican was developed by them hundreds of years ago. It became very popular with European settlers and fur trader in the region. The Arctic explorers, who were looking for food in the Arctic, used pemmican later. Today, pemmican is often a staple in backpacking trips.
FAQ
My survival gear should be stored where?
You should keep your emergency supplies close by so that you are always ready for an emergency. Your best place to store your survival gear is under your bed or in your closet.
You need to label all supplies with the contents, date, and how they were used so you can easily identify which ones are good and which are not.
Also, be sure to keep another copy of your inventory. If something happens to your house or apartment, you'll need proof that you had the right stuff.
What should you pack in a bug out bag?
A Bug Out Bag is a kit to provide you with food, water and shelter for 72 hours. It includes a flashlight with a whistle, compass and knife, a whistle, a fire starter, compass, knife and matches.
You will likely only use half of the items you choose to place in your BOB. Choose wisely.
What information do I need before I can start my doomsday prep?"
First, collect information about the locality. What natural disasters could you expect to happen in your locality? Are there any major risks?
You should consider purchasing flood insurance if your home is in a flood zone. Flooding is a threat to life that can occur during a crisis.
Insurance for tsunamis is a good idea if you live on the coasts. Underwater earthquakes cause tsunamis. They often occur without warning, so it's best to be prepared.
Next, figure out how long it will take you to become self-sufficient. What is your ability to take care of yourself?
Will you only be gone for a few days? Will you be away from your home for weeks, or months?
Do you plan to live alone? You will likely need a weapon if you live alone. It doesn't matter whether you choose a gun, a bow and an arrow. It doesn't matter what type of tool you choose, just make sure that you are comfortable with it.
In addition to weapons, you'll also want to include tools like a shovel, axe, saw, hammer, nails, rope, and other items. These are tools that can be used to create shelters or makeshift weapons.
Finally, you'll likely want to stock up on extra food and water. You should ensure you have enough food and water to last several days.
Don't forget that you don’t have to buy all the items on this list. At the very least, you need to get started.
What is the best food for survival?
You should carefully consider what you're buying. Without enough water, you'll not last long. You should find a place that offers plenty of water and ensure you have enough to last.
Food can be purchased in dried beans or rice, as well as pasta and dehydrated foods. Whatever you choose, make sure you store them properly, so you don't lose anything.
You might also consider getting some freeze-dried food as well. These are more costly than regular food, but they last a lot longer.
What medical supplies should you keep in your stockpile?
If you are going to have an emergency situation with a shortage of any type of medicine, then make sure you have enough for at least three months. This can be done by stocking up all types of medications including pain relievers and antibiotics. You might also want to think about storing food. This is because you won’t have as much time to prepare them if your medications are out of stock.
What are my emergency supplies?
It is important that you plan ahead to be ready for any situation if your trip will last for a while. Consider packing water, food, a first-aid kit, torch, batteries, and other essentials. This will allow you to feel more prepared, and will increase your confidence that you can survive any situation.
Start with a basic first-aid kit. It should contain antiseptic creams as well painkillers, bandages and gauze pads. Tweezers, scissors, thermometers, alcohol swabs and tweezers are also recommended. To see what you have in your kit, you might also need a small flashlight during power outages.
These items can be stored in a container with a lid. This will keep them dry and clean.
Another thing to consider is storing a couple of weeks' worth of food. You could even freeze your own food. These recipes are simple to prepare and don't require any cooking pans or pots. Add hot water to make it ready to eat.
A solar-powered backup battery system would also be a great idea. This will allow you recharge your smartphone, tablet, or laptop.
Statistics
- A gravel bike was the clear winner, receiving more than 90 percent of the votes. Background: This summer, we surveyed our readers about what they’d shove into a backpack if they were caught unprepared for the collapse of society. (inverse.com)
- A survey commissioned by National Geographic found that forty percent of Americans believed that stocking up on supplies or building a bomb shelter was a wiser investment than a 401(k). (newyorker.com)
- In the first ten months of 2016, foreigners bought nearly fourteen hundred square miles of land in New Zealand, more than quadruple what they bought in the same period the previous year, according to the government. (newyorker.com)
External Links
How To
How to treat a cut in a survival situation
What should you do in case you get hurt? You must first think about how to treat your wound. You must know how to stop bleeding and clean up the wounds. You must then prevent the infection spreading. You should consult a doctor if the wound becomes too large.
Before you get hurt, prepare yourself. Be sure to have plenty of water and food. It's helpful to have a basic medical kit. A knife and rope are also essential. These items are essential for you to always have. These items could be of assistance to you if you find yourself in trouble.
If you don't have any of those things, you might want to buy them. Basic knowledge is important. For example, you should know how to use bandages and disinfectants. Also, learn how to properly use a knife. Use pressure when cutting anything. This will prevent blood from escaping.
When you find yourself in a survival situation, you should look around to see if there is anything useful nearby. You could use a stick for digging a hole. A rock can be used to crack open a shell. It is important that you immediately attend to your wound. Do not allow it to become infected.
To clean the wound, you should wash it with soap and warm water. Apply antiseptic cream afterward. Cover the wound with a bandage. Bandaging keeps the wound dry and prevents infection.
You should inspect the wound daily after applying the bandage. If the bandage becomes stained, you should immediately remove it. It can lead to infections.
Tell someone else if pain is felt while cleaning the wound. He/she might be able to help. It is also a good idea to ask the person to clean your wound.
If you are alone, you should stay still for at least 10 minutes after cleaning the wound. This will allow the dirt settle.
Avoid scratching the area. The germs will be able to easily get into the body if you scratch the skin. You should also avoid touching the area where the wound is located. Germs can be spread by touching the wound.
You should protect your wound by covering it with a bandage. The bandage should be changed frequently. This will keep your wounds from getting infected.
If you don't have a bandage, you can use leaves. You can easily find leaves. A piece of cloth can be used as a bandage.
It is important to pay attention also to the weather. If the temperature drops below 40 degrees Fahrenheit, you should dress the wound more carefully. Cold air can slow down healing.
Long sleeves and long pants are recommended for those who live in colder areas. Gloves should be worn. Gloves should be worn on your hands.
You should not walk barefoot. Blisters can result from walking without shoes. These blisters could easily become wounds.
First aid supplies should be carried if you go camping or hiking. You should also bring small items such as bandages or other items.
You should also consider the type of injury you got. You should visit a hospital if you require stitches.
Don't touch burns if you are just getting them. That way, you can prevent infection.
Stop hunting, fishing or trapping immediately if you get hurt. First, dial 911.